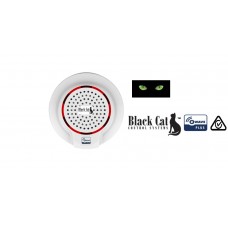
The Messaging Centre is an intelligent device that can be controlled remotely.
It can send messages via a Z-wave network to the Z-Wave main controller.
In the Z-wave network communications, the Messaging Centre can be connected to any Z-wave main controller.
In communications between the Messaging Centre and Z-wave main controller, the Messaging Centre can send and receive messages.
When you press the code button of the Messaging Centre, it will send a message to the Z-wave main controller, the Z-wave main controller can display the on/off status of the Messaging Centre; when the Messaging Centre receives messages from the Z-wave main controller, the siren alarm will be triggered.
The Messaging Centre is battery powered, small and easily install. When the Messaging Centre is working, the LED light will flash and there will be a alarm sound at the same time.
- The sound is not lower than 90 decibels.
- 10 different sounds are available in 2 different categories, Alarms and Alerts which give atotal of 20 sounds available.
| Technical | |
| Range | Minimum: 40M Indoors. 100M Outdoors line of sight. |
| Power Supply | |
| Battery | 3 VDC Lithium |
| Warranty | |
| Warranty | 12 Months |
- 10 Selectable Alarm or Alert Sounds
- When the Message Centre is triggered, the Message Centre will make a alarm or alert sound and the LED light flashes at the same time.
- Can be Associated with other sensors through the Z-wave network, such as a Black Cat PIR, Door Window or Water detector.
- Compatible with any Z-wave controller.
l Power supply:CR 123A x2
l Stand-by time: 1 year
l Radio Frequency: 921.4mHz
l Compatible with 300 series and 500 series
l Easy installation on wall or any surface
l 10 sound can be select
l Range: up to 70m outdoor
up to 50m indoor
l Radio Protocol: Z-wave
l Sound intensity: >90 dB
l Operation temperature: 0~40℃
l Storage temperature: 0~60℃
l Dimension: (D x W x H):70mm x 68mm x 31mm
How to Change to Change the Chime Sounds in Vera using a Scene.
- Find your Siren's Node ID. To do this, go to the "Devices" tab, click the arrow next to your Siren, go to the "Advanced" tab, and note the value next to "altid" (figure 1.) Click "Next" when done.
- Create a Scene and choose your trigger. To do this, go to the "Scenes" tab, click "Add Scene," and choose your trigger. In our example, we will manually trigger the scene (figure 2.) Click "Next" when done.
- Click "Next" to skip the "Device Actions" step, since the chime will be a "Luup Code" added in the next step.
- Click "No Luup Code defined" under "Also, execute the following Luup code:" (figure 3.)
- Copy-paste the code below into the text box. Replace XX with the Node ID/"altid" found in step 1, and replace Y with a number from 1-10 - this number (Y) corresponds to each of the ten different chime sounds (figure 4.)
luup.call_action('urn:micasaverde-com:serviceId:ZWaveNetwork1','SendData',{Node='XX',Data='x87 1 Y'},1) - Click "Save Lua," then click "Finish."
- Test your scene by pressing the "Play" button or triggering the event.

Figure 1 - Finding your Node ID (3rd line, "32" in this example.)

Figure 2 - Selecting a Trigger For Your Chime

Figure 3 - Adding a Luup code

Figure 4 - The Luup Code in Vera. In this example, chime "9" will play through node 32.
with thanks to DomeHA for the above "How to"
Note: This may not be best practice as there will be a time delay in setting the Parameter.
If time is critical between Alerts, consider the use of 2 Message centres, one for Alerts Chimes, the other for Alarms.
Black Cat Z-Wave Multi-Message Centre
- Brand: Black Cat
- Product Code:
ZWBCMC-AUS - Availability: In Stock
- AUD $ 74.95
-
AUD $ 59.95
-
- 5 or more AUD $ 61.71
- 10 or more AUD $ 58.46
Related Products
Black Cat Z-Wave 4 in 1 Multi-Sensor
This slim multisensor has PIR, door/window, temperature and illumination sensors. 4 sensors functi..
AUD $ 49.95 AUD $ 84.95
Black Cat Cat's Eye Z-Wave PIR Sensor
The Cat’s Eye PIR Sensor ZWBC21S-AUS has PIR and luminosity functions built in, these are all based..
AUD $ 49.95 AUD $ 59.95
Black Cat Cat's Eye Z-Wave Door/Window Sensor
The Cat’s Eye Door Window Sensor ZWBCCEDS-AUS is a Z-WaveTM Plus product that supports Security and ..
AUD $ 44.95 AUD $ 49.95
Black Cat Z-Wave Flood Water Leak Detector
Black Cat Flood Water Leak Detector. This sensor is an intelligent security device that can tr..
AUD $ 49.95 AUD $ 64.95


